EKS Deployment: We Need to Run Our App
Our journey is almost to completion (maybe we will build on this project in the future :D ). In Part 3, we built an automated CI pipeline. Our my-chat-app image is now built and pushed to an AWS ECR “warehouse” every time we commit code.
But that’s where it stops. Our image is just sitting in a warehouse, not running.
In this (maybe) final post, we’ll build our “factory”, a live Amazon EKS (Kubernetes) Cluster and deploy our application for the world to see.
- We’ll use
eksctl, the official CLI for EKS. It’s a simple, powerful tool that can create an entire cluster with a single command. Doing this manually in the AWS console is a 50-step, error-prone nightmare. We should automate it.
eksctl works in the background (using AWS CloudFormation) to build an entire stack ready for deployment for us:
- A new VPC with public and private subnets
- All the necessary IAM roles and security policies
- The EKS control plane itself
- A connection to our local kubectl so it’s ready to use
It saves us hours of work and guarantees our cluster is built correctly.
- We’ll also use AWS Fargate to run our containers, meaning we don’t have to manage any EC2 server nodes. A Kubernetes cluster needs compute power to run our containers. Traditionally, this meant creating a bunch of EC2 (virtual server) instances that we are responsible for.
This means we would’ve had to:
- Pick the instance size (e.g., t3.medium)
- Manage scaling (What happens if we get a traffic spike?)
- Perform security patching and OS updates on all those servers
AWS Fargate is the “serverless” alternative. It lets us use EKS without managing any servers at all. You just show up with your app (your container), and AWS instantly gives you a room of the exact size you need (e.g., 1 vCPU, 2GB RAM).
- AWS Load Balancer Controller: We will install this add-on, which is the “brain” that lets Kubernetes create modern Network Load Balancers (NLBs).
Before we begin, make sure your AWS CLI is configured with the correct credentials and region, or you wont be able to use eksctl as it requires AWS CLI credentials to authenticate.
EKS can get costly. Make sure you delete your cluster when you’re done.
Step 1: Building the Cluster
eksctl is a single command that creates all the complex AWS resources (VPCs, subnets, IAM roles, and the EKS cluster itself) for us.
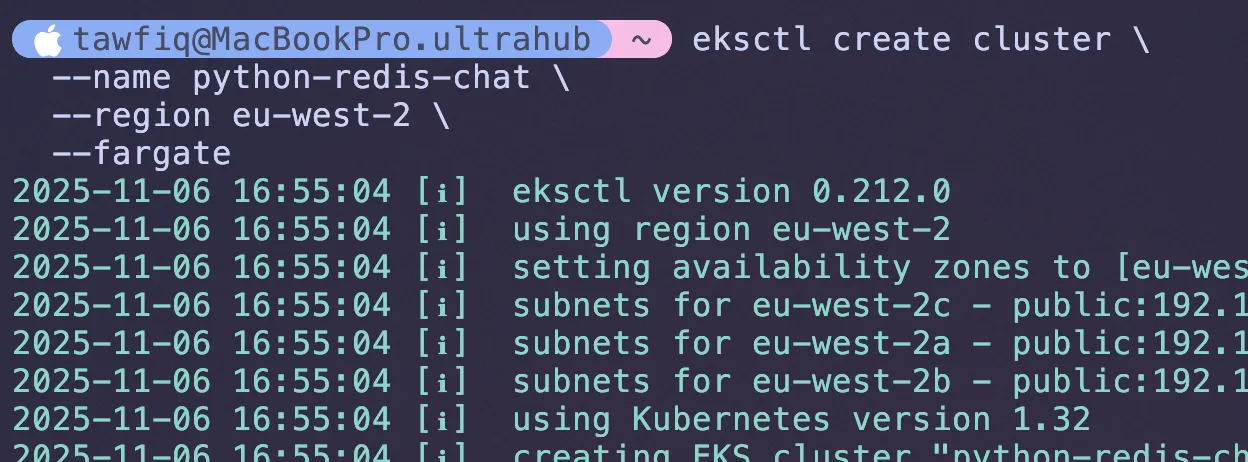
I ran this command in my terminal: (change region if you need to)
eksctl create cluster \ --name python-redis-chat-1 \ --region eu-west-2 \ --fargate--name: Gives our cluster a unique name.
--region: The AWS region to build in.
--fargate: This is the magic flag. It tells eksctl to set up our cluster to be “serverless” and create a default Fargate profile to run Kubernetes system pods.
Be patient and after 15-20 minutes, your eksctl should be finished and has automatically configured your local kubectl to talk to the new cluster. You now have a live Kubernetes cluster running in AWS.
Note: The --fargate flag creates a default Fargate profile for system namespaces like kube-system. If you deploy applications to custom namespaces, you’ll need to create additional Fargate profiles using eksctl create fargateprofile.
You can go to the AWS console and see the cluster resources created by eksctl in the EKS Service.

Step 2: Install the AWS Load Balancer Controller (The “Brain”)
This is a critical step. To create a modern, high-performance Network Load Balancer (NLB) that can talk to our Fargate pods, we must install this add-on controller.
This documentation was my saviour, it helped me figure out why my application wasn’t working properly when sharing the link with other users access my application. Always check documentation if stuck. I promise.
We will be following the second guide to Install AWS Load Balancer Controller with Helm.
2a. Create the IAM role
Lets download the IAM policy for AWS load balancer controller which allows us to make API calls
curl -O https://raw.githubusercontent.com/kubernetes-sigs/aws-load-balancer-controller/v2.14.1/docs/install/iam_policy.jsonWe will use this policy to create a policy profile in AWS IAM console.
aws iam create-policy \ --policy-name AWSLoadBalancerControllerIAMPolicy \ --policy-document file://iam_policy.json2b. Create the service account
It allows any pod using the aws-load-balancer-controller service account to automatically and securely assume the IAM role and get the AWS permissions it needs, without you ever having to store or manage aws_access_key_ids in Kubernetes.
Replace the values for cluster name, region code, and account ID.
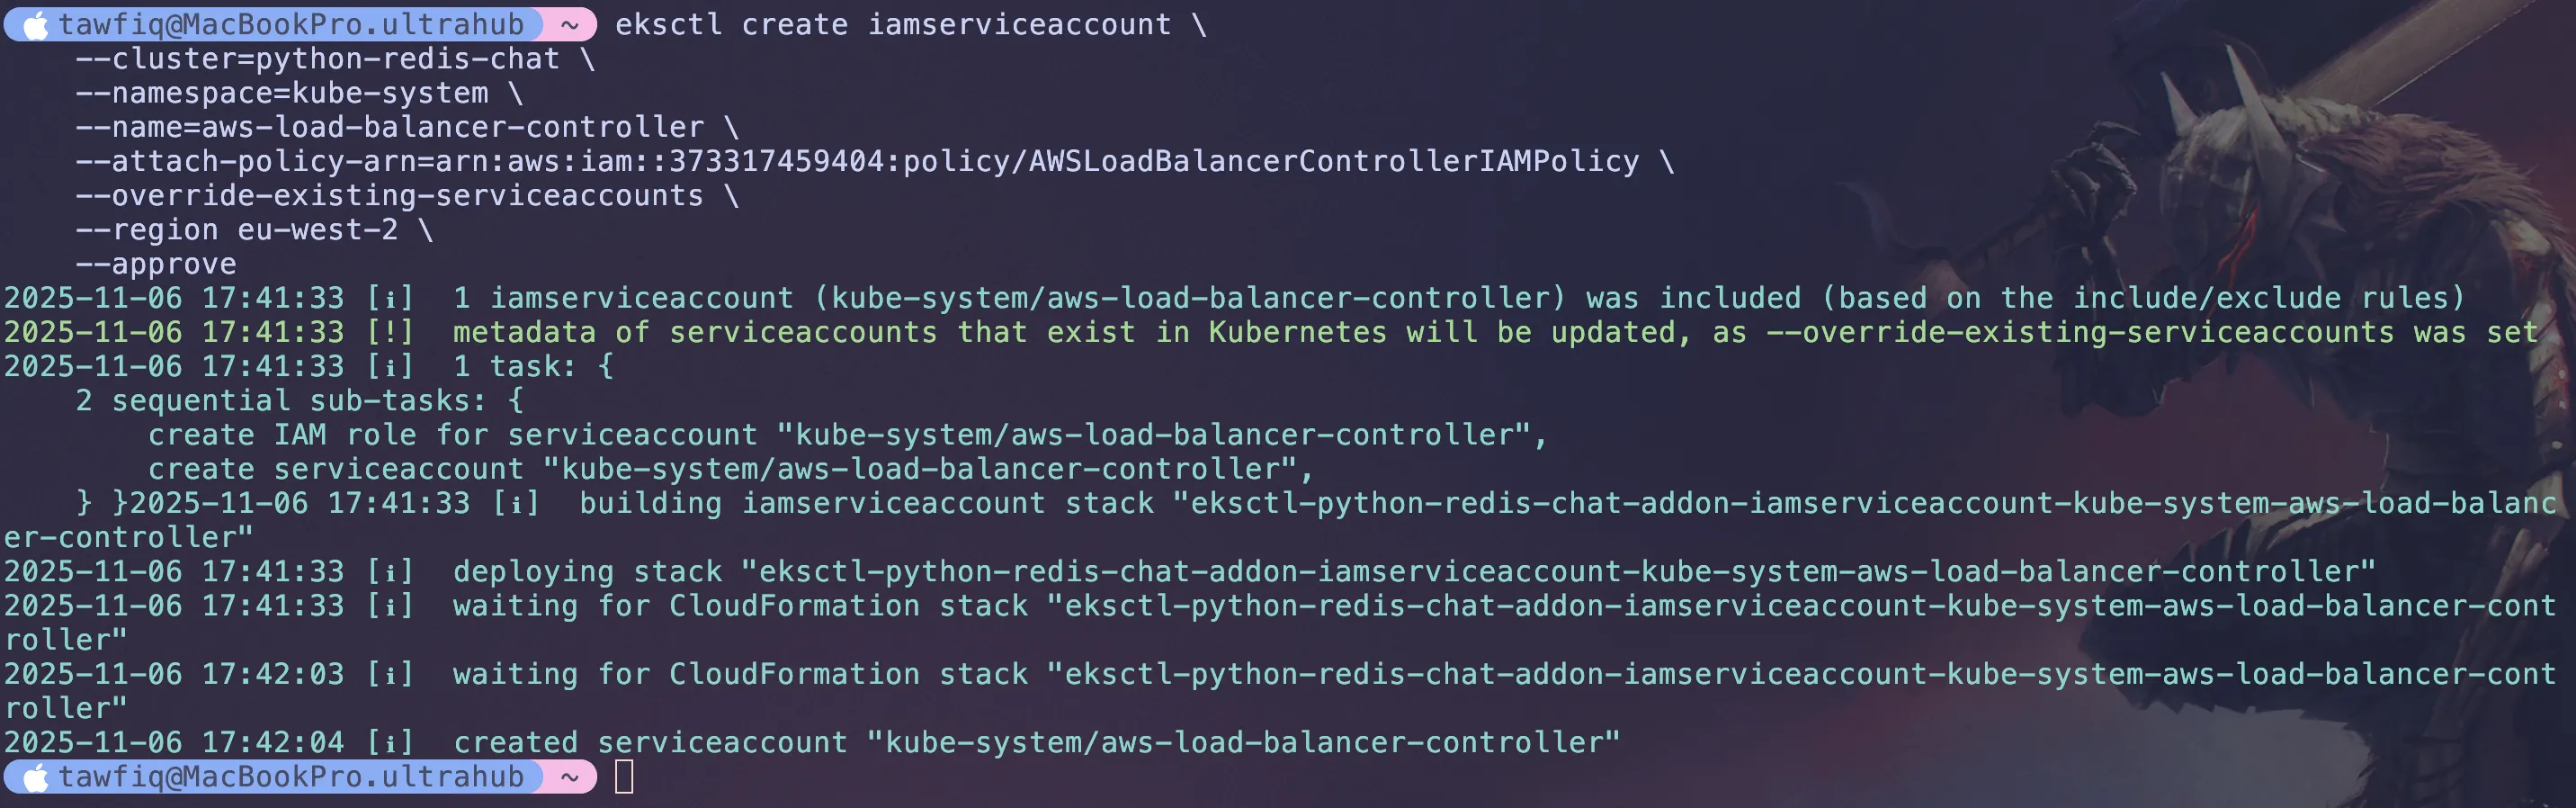
eksctl create iamserviceaccount \ --cluster=python-redis-chat-1 \ --namespace=kube-system \ --name=aws-load-balancer-controller \ --attach-policy-arn=arn:aws:iam::${AWS_ACCOUNT_ID}:policy/AWSLoadBalancerControllerIAMPolicy \ --override-existing-serviceaccounts \ --region eu-west-2 \ --approve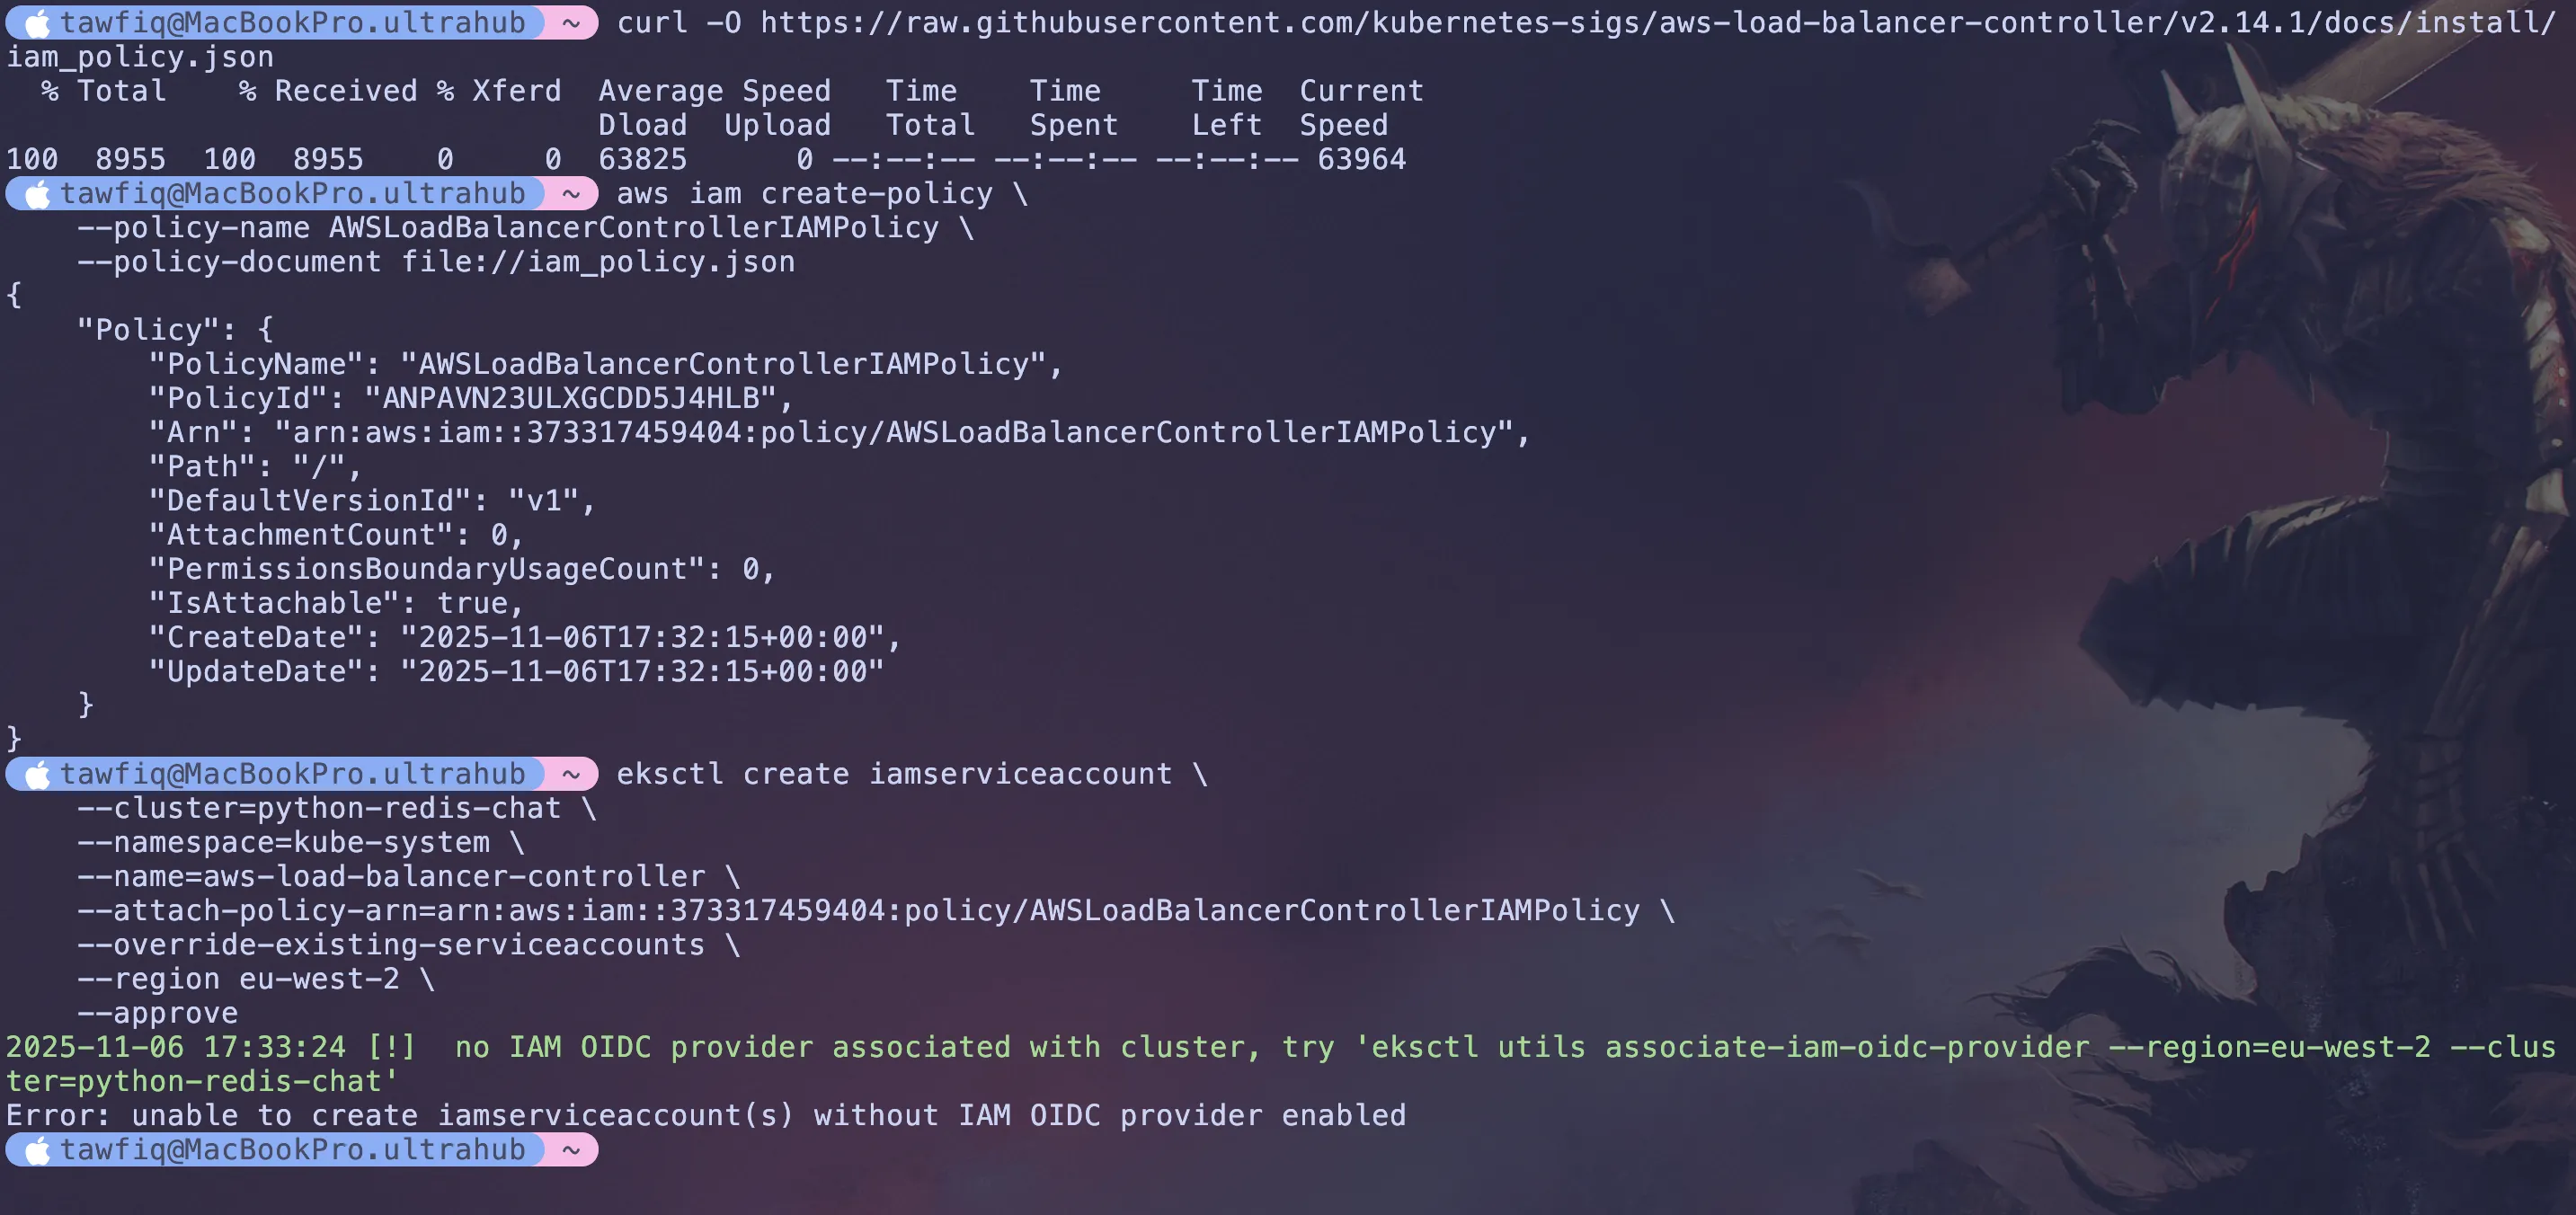
I actually got an error because i needed an IAM OIDC profile (what i was talking about in the previous part) and this is like a way to enable secure access between Kubernetes and the AWS resources.
Run the below
eksctl utils associate-iam-oidc-provider \--region=eu-west-2 \--cluster=python-redis-chat-1same again with --approve at the end
eksctl utils associate-iam-oidc-provider \--region=eu-west-2 \--cluster=python-redis-chat-1 \--approveThen rerun the previous command and service account should be created successfully.

2c. Installing AWS Load Balancer Controller
We will be using something called Helm (I recommend researching this topic as its a powerful tool). Essentially, Helm is a package manager for Kubernetes that allows you to easily install and manage applications on your cluster.
Ensure Helm is installed.
For macOS (Homebrew):
brew install helm
For Linux/Windows: Users can follow the official installation guide (https://helm.sh/docs/intro/install/).
Next, Add the eks-charts Helm chart repository. (this tells Helm where to find the charts)
helm repo add eks https://aws.github.io/eks-chartsUpdate your local repo to make sure that you have the most recent charts.
helm repo update eksNow lets install the aws load balancer controller from the helm charts we added
(this is what watches for any ingress.yaml file)
Replace eu-west-2 and your-vpc-id-here with your actual region and VPC ID.
the service account we are attaching is what has the aws load balancer policy permission added to it and thats what will be allowed to create it.
helm install aws-load-balancer-controller eks/aws-load-balancer-controller \-n kube-system \--set clusterName=python-redis-chat-1 \--set serviceAccount.create=false \--set serviceAccount.name=aws-load-balancer-controller \--set region=eu-west-2 \--set vpcId=your-vpc-id-here \--version 2.14.1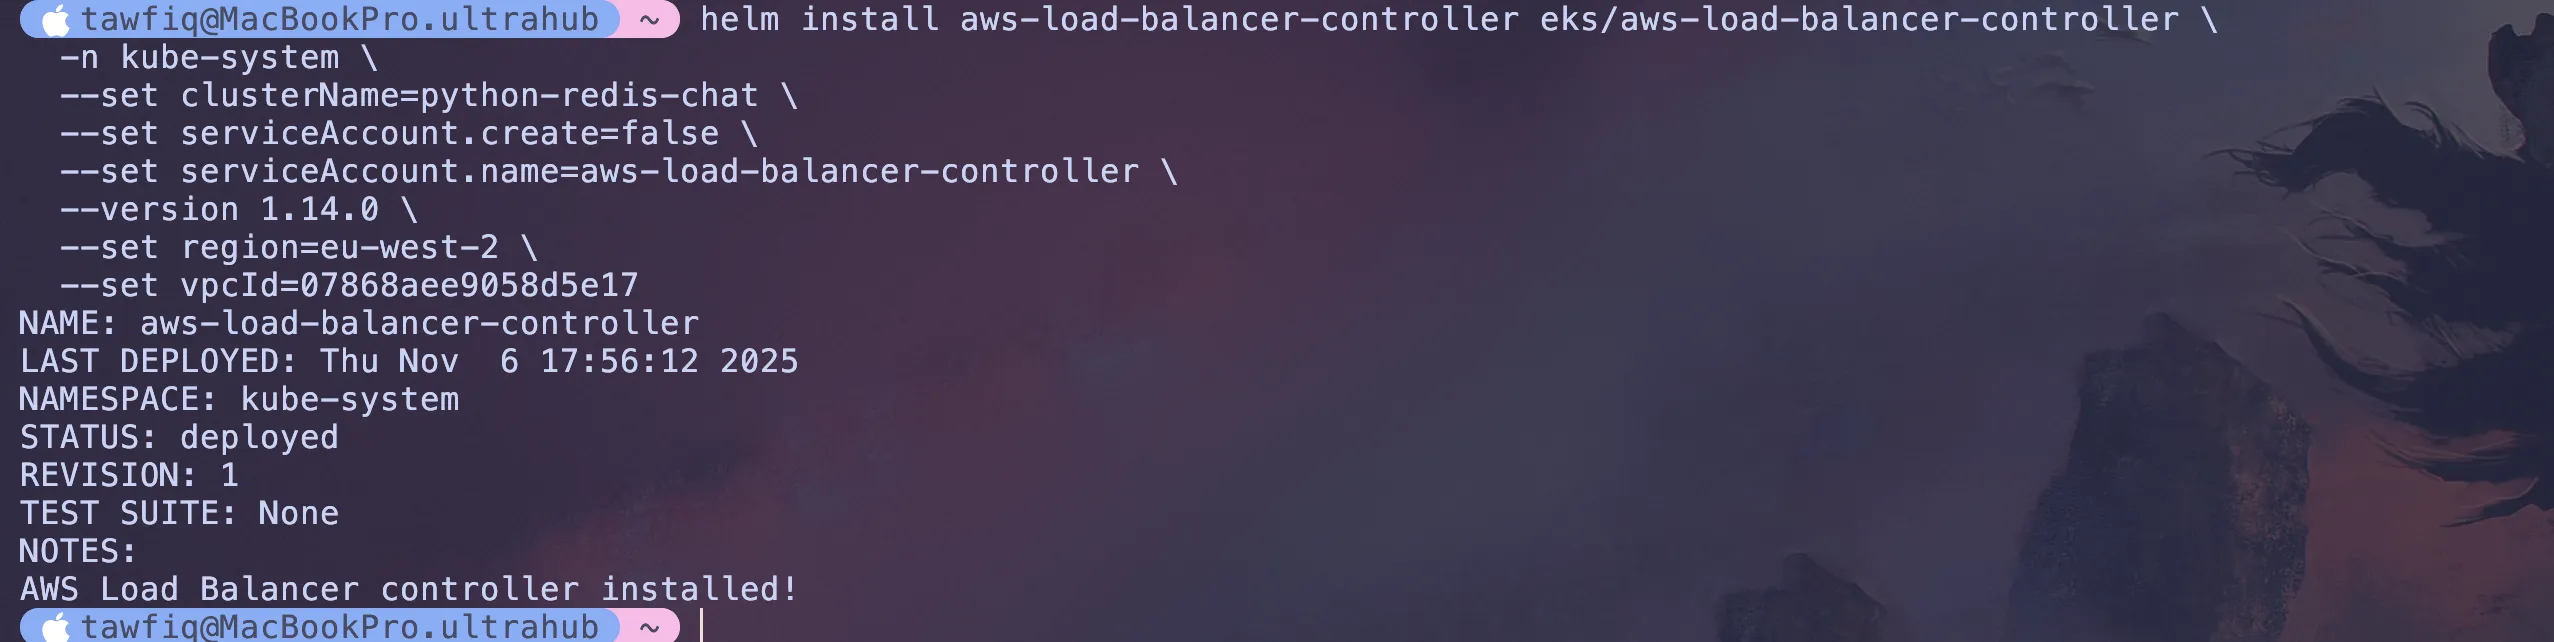
to verify its all working it can take up to 2/3 minutes
kubectl get deployment -n kube-system aws-load-balancer-controller
You should see 2/2

Step 3: Translating Our App for Kubernetes (The Manifests)
This is probably the biggest step. We need to “translate” our manual docker run commands from Part 2 into a set of declarative YAML files that Kubernetes understands.
These files are called manifests. I created a k8s/ folder in my repo to hold them. This folder will contain all the necessary Kubernetes configuration files for our application.
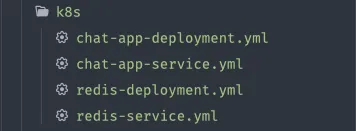
3a. The Database: redis-deployment.yml & redis-service.yml
First is the Redis database. We need two files:
k8s/redis-deployment.yml: This tells Kubernetes how to run the Redis container. It defines “I want one copy (replicas: 1) of the official redis:latest image.”
apiVersion: apps/v1kind: Deploymentmetadata: name: redis-deployment labels: app: redis-db # This label is how the Service will find these podsspec: replicas: 1 # We only need one copy of our database selector: matchLabels: app: redis-db # Match the pods with the label "app: redis-db" template: metadata: labels: app: redis-db # Apply this label to the pod(s) spec: containers: - name: redis image: redis:latest # The official public image from Docker Hub ports: - containerPort: 6379 # The default port Redis listens onHere’s what each part of this file does:
kind: Deployment tells Kubernetes we want to create a Deployment, a resource that manages our pods and handles rolling updates and scaling.
replicas: 1 ensures there’s always one copy of our Redis pod running.
selector: matchLabels is how the Deployment knows which pods it’s responsible for managing. It uses the label app: redis-db.
template: metadata: labels is the label we stamp onto the pods. Because this matches the selector above, the Deployment knows this is the pod it needs to manage.
containers is where we define what actually runs:
name: redisis just a name for the containerimage: redis:latesttells Kubernetes to pull the official Redis image from Docker HubcontainerPort: 6379documents that our container listens on port 6379
k8s/redis-service.yml: This is the networking. This is how our app will find the database.
Here is the redis-service.yml:
apiVersion: v1kind: Servicemetadata: name: redis-servicespec: type: ClusterIP selector: app: redis-db # This must match the 'app' label in your redis-deployment.yml ports: - port: 6379 targetPort: 6379name: redis-service: This is the magic. Kubernetes has its own internal DNS. By creating this, any other pod in our cluster can now find our database simply by using the hostname redis-service.
type: ClusterIP: This is the most important line. It says, “This service is internal only.” It’s not accessible from the public internet.
In simple terms, docker run --name redis-db... is equivalent to kubectl -f redis-deployment.yml and docker network create.. is equivalent to kubectl -f redis-service.yml.
3b. The App: chat-app-deployment.yml & chat-app-service.yml
Next, our Python chat app. This also gets a Deployment and a Service.
k8s/chat-app-deployment.yml: This file tells Kubernetes how to run our app. The most important part is the env section:
apiVersion: apps/v1kind: Deploymentmetadata: name: chat-app-deploymentspec: replicas: 2 # Let's run two copies for high availability! selector: matchLabels: app: my-chat-app template: metadata: labels: app: my-chat-app spec: containers: - name: my-chat-app image: 123456789.dkr.ecr.eu-west-2.amazonaws.com/my-chat-app:latest # My ECR Image ports: - containerPort: 8080 env: - name: REDIS_ENDPOINT_URL value: 'redis-service:6379' # <-- This is the "magic glue"!Make sure here to replace the image name with your own ECR image URL.
This is the “Ahhhh!” make sense moment(well for me). In Part 2, our docker run command used -e REDIS_ENDPOINT_URL=redis-db:6379. Here, in our deployment manifest, we are passing the exact same variable, but this time the value points to our new Kubernetes service name, redis-service.
k8s/chat-app-service.yml: This is our “front door.” (I had to debug a lot of things here with the service but it works for this project)
apiVersion: v1kind: Servicemetadata: name: chat-app-service annotations: service.beta.kubernetes.io/aws-load-balancer-type: 'external' service.beta.kubernetes.io/aws-load-balancer-nlb-target-type: 'ip' service.beta.kubernetes.io/aws-load-balancer-scheme: 'internet-facing'spec: type: LoadBalancer selector: app: my-chat-app ports: - port: 80 targetPort: 8080 protocol: TCPtype: LoadBalancer: This is the other crucial setting. It tells Kubernetes to ask AWS to create a real, public Load Balancer and point it at our app.
port: 80, targetPort: 8080: This tells the Load Balancer to accept public traffic on port 80 (standard HTTP) and forward it to our container’s internal port 8080 (where Gunicorn is running).
Step 4: The Deployment (kubectl apply)
With our cluster running and our YAML files written, the final deployment is a single command. I told Kubernetes to apply all the configuration files in my k8s/ directory:
Now lets run the command to apply the configuration files, its easier than doing it once at a time:
kubectl apply -f k8s/
Kubernetes now does all the work for me:
Pulls the redis:latest image and starts the database pod.
Pulls my my-chat-app image from my private ECR.
Starts my two app pods (because I asked for replicas: 2).
Provisions a new AWS Load Balancer.
The Final Result: It’s Live!
After a few minutes, I ran two commands to check the status.
First, I checked the pods. I can see all three pods are Running:
kubectl get pods
Next, I checked my services to find the public URL:
kubectl get services
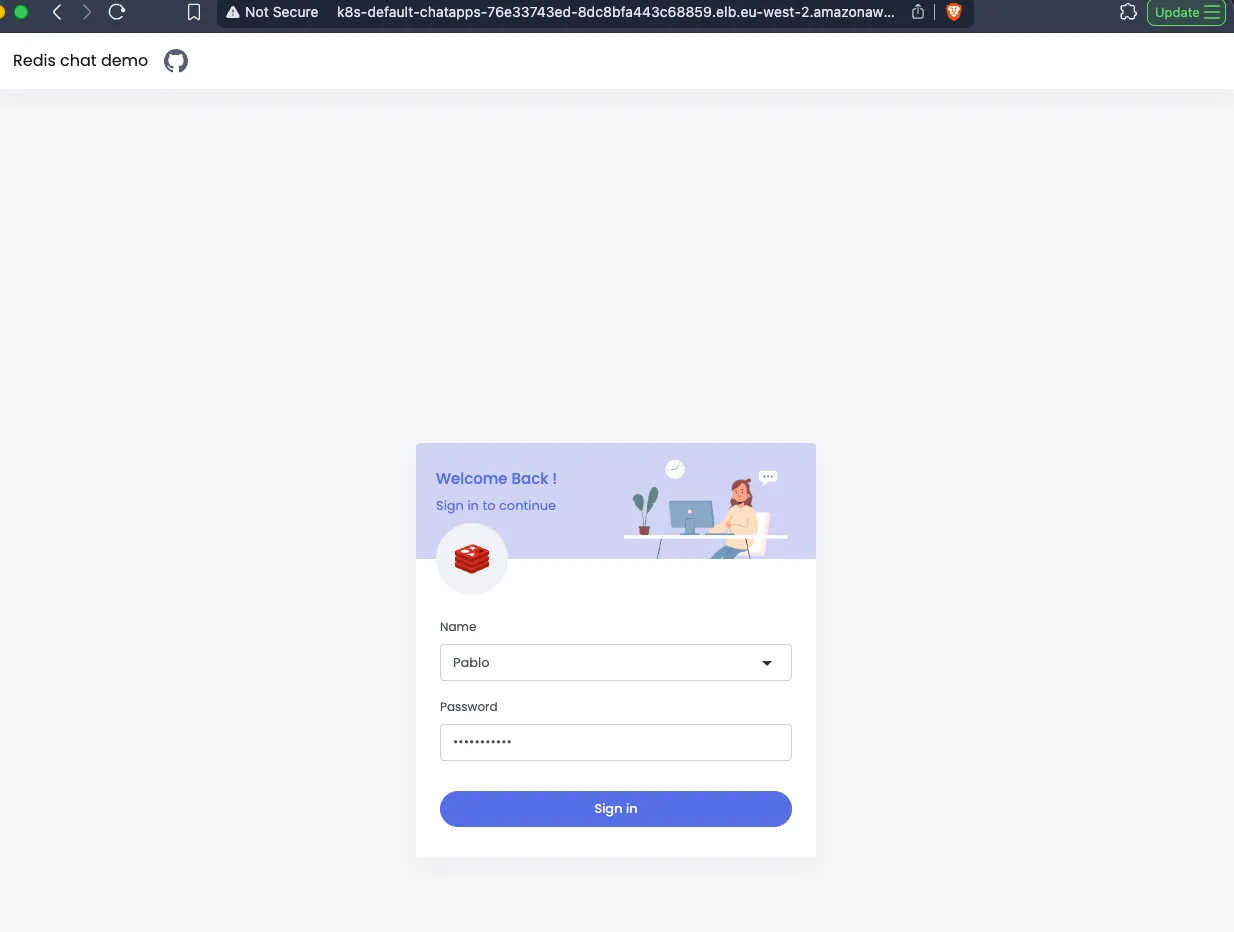
As you can see, the Load Balancer has a public IP address:

I copied the external IP address and pasted it into my browser. The chat app was live! Anyone can connect to it!
We have completed a full deployment of a Python chat app using Kubernetes on AWS. We created a Redis database, a Python app, and a Load Balancer to expose the app to the internet. We also learnt how to use YAML files to define our Kubernetes resources and how to apply them using kubectl.
Here’s a video demo: (best in full screen)
When you’re finished, don’t forget to clean up your resources by deleting the cluster and Load Balancer.
eksctl delete cluster --name python-redis-chat-1